

Are you ready to try acrylic painting but not sure where to start? Or maybe you have already started painting, but just need a few pointers.
Acrylics are great for beginners. They are fairly easy to use, dry quickly, and are cheaper to buy than oils or watercolours. A few simple acrylic painting tips will help you get started and enjoy the creative process.
**This page may contain affiliate links to products I have used or recommend. If you purchase something from this page, I may receive a small percentage of the sale at no extra cost to you. For more information, click here.**
Acrylic Paint
1. If you can afford it, use professional-grade paint, not craft paint.
Many good brands are available at various prices.
Professional artist paint has more pigment, which makes it easier to blend and provides better coverage. Most major brands also have decent student-grade paints that are good paints for beginners.
2. Acrylic paint dries fast.
This can be great if you don’t want to wait days for a layer to dry, as you would with oil paints, but it can be a little frustrating when you want to blend.
It’s best to work quickly with acrylics or use an extender designed to slow the drying time.
The fast drying time is also not great if you happen to spill paint on your clothes. This post has a few tips on how to remove acrylic paint from clothes.
If you are really impatient, you can use a hair dryer on the low setting to speed up drying time.
3. Learn how to mix colours.
Learning to mix your own colours and shades will save you money and expand your palette. You can learn to mix any colour from the three primary colours: red, blue, and yellow.
I have a post on colour theory you can read to get an idea about colour mixing.
I also have a YouTube channel with a whole playlist devoted to colour mixing. Trembeling Art YouTube

4. Acrylic paint generally dries a little darker.
The cheaper the paint, the darker it will dry because the paint contains less pigment and more filler.
5. Buy basic colours to begin with.
Red, blue, yellow, black, white, and an earthy tone like burnt umber are good choices. You can mix other colours as needed.
Eventually, you will figure out which colours you use most, and you can buy those. There are often starter sets available in student-grade paint, such as this one from Liquitex, which is a good place to start.
Liquitex Basics acrylics are student-quality paint, but with the same high-quality pigments as professional-grade. An excellent paint for beginning artists.

6. If you are using cheaper craft-type paints ( because of cost or availability), you can try adding a tiny bit of white to make them more opaque. Cheaper paints have less pigment and are, therefore, more transparent.
White will lighten the paint, so you might consider using a slightly darker shade or applying multiple layers to achieve the tone you want.
Brushes

7. Clean your brushes with mild soap and water after each painting session. Dried paint is almost impossible to remove from brushes.
Lay your brushes flat to dry to prevent water from getting into the ferrule and loosen the glue. Water will also cause the wood to swell and the lacquer on the handle to peel.
Never leave your brushes sitting in water for long periods of time for this reason.
For more information about cleaning your brushes, see my post titled “The Best Way to Clean Brushes.”
8. Store your brushes with the bristles facing up.
The bristles can become splayed and bent if they are stored with the bristles down in a jar. Make sure they are clean and dry, and then store the bristles in a jar or other container.
9. Synthetic brushes are best for acrylic painting. You need a brush that isn’t stiff or too soft.
The brushes don’t need to be expensive, but avoid the cheap dollar-store brushes. They frequently shed hair into your paint, and the bristles separate after a few uses.
10. Just a few brushes are all you need to begin with. Filbert brushes (flat with an oval top) in a few different sizes are good to start with.
Also, a larger flat wash brush and a fine detail brush are good to have. You can often buy these in sets that are fairly inexpensive but still good for beginners.
You can add to your collection over time and develop your own preferences for brushes.
This set includes round, angle, filbert, flat, fan, rigger, and cat’s tongue brushes in useful sizes. The variety gives you options for broad strokes, curved marks, clean edges, texture, fine lines, and small details without having to buy each brush style separately.

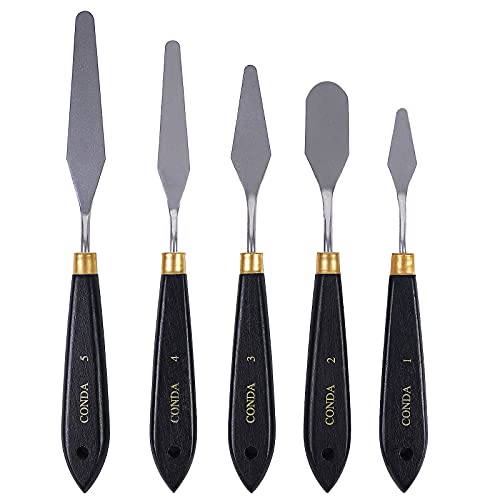
11. Mix paint with a palette knife.
These are also inexpensive and easy to use for mixing and painting. ( See my post on How to Use a Palette Knife).
If you don’t have a palette knife, you can use a plastic knife, or even an old credit card, or a craft stick.
Painting knives are great for adding different textures to a painting. You can add thick layers of paint with a painting knife for things like mountains, rocks, or other interesting textures.

A quality set of painting and palette knives used for applying paint to the canvas, shaping colours once they're applied, and mixing paints on the palette.
More Painting Tips
12. Don’t compare yourself to others. Your art and your art journey are unique to you. It is unfair to yourself to compare your artwork to someone who has been painting for years.
Don’t compare your beginning to someone else’s middle.
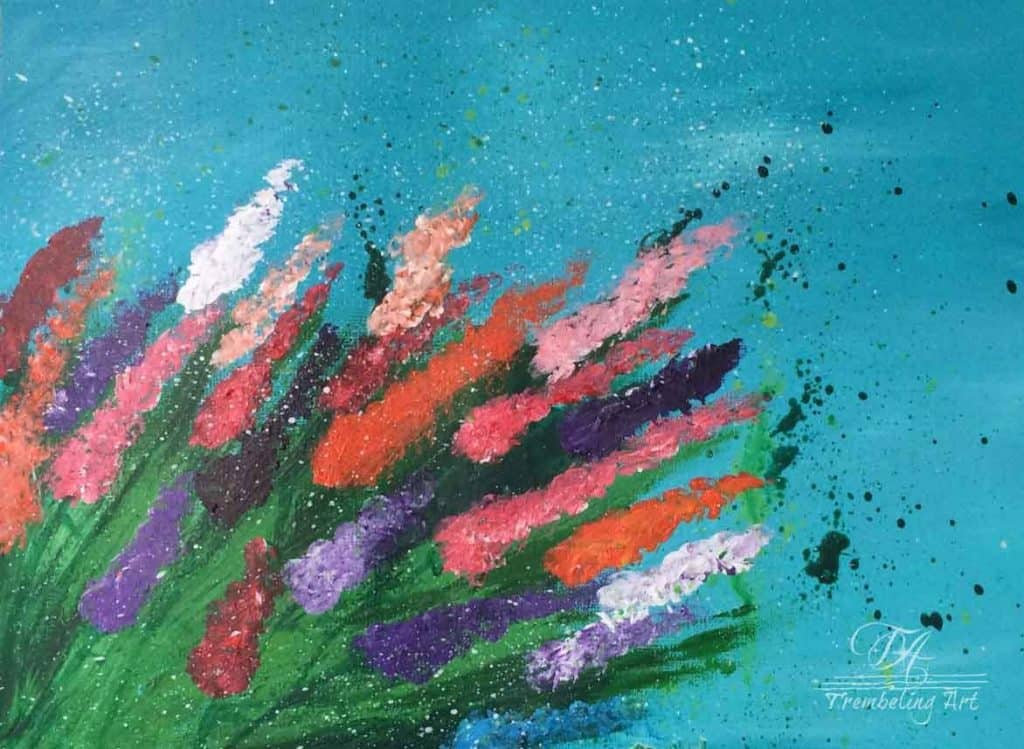
13. Sign and date your artwork….even your first attempts at painting. Signing your painting gives you a sense of ownership and makes you feel like the artist you are.
Dating each piece gives you a reference point so you can look back and see how far your skills have grown over the years.
14. Take pictures of your artwork. Pictures provide a visual record for yourself and can be used for social media posts, online portfolios, and web pages.
15. Make notes as you paint for future reference. Jot down how you mixed colours, what composition you liked, and where you got your reference photo or something you learned or observed while you painted. You can refer back to these notes in future painting sessions.

16. If you make mistakes and want to paint over them, you can usually cover most paintings with a coat or two of gesso. (See my post on How To Gesso A Canvas). Give the gesso a light sanding, and you can start over again.
17. Keep practicing. Learning to paint is a long process, and the more you paint, the better you get. Try to paint something every day, even if it is only blocks of colour or random shapes.
The more you practice, the more comfortable you will become with the brush and paint.
18. Step back from your painting frequently. From a couple of feet away, you get a better perspective. You can better see the overall composition and how well the colours are working together.

19. Keep a spray bottle of water handy to mist your paints and keep them from drying out. You can also mist your painting surface to keep your paints wetter for blending. Try to find a bottle with a fine-mist sprayer to avoid large water droplets. Find out more about palettes to keep your paint wet in my post on palettes.
I use an empty body spray bottle that has been thoroughly cleaned.
20. Take time to practice blending. Since acrylics dry so fast, there is a learning curve to getting the blending down.
Wet-into-wet blending requires some planning to get the paint colours down quickly and blend them before they dry.
21. You can paint on just about anything. Canvas is the usual surface for an artist, but wood, paper, or anything that paint will stick to can also be used.
My first painting was done on an old ceiling tile. For more ideas for painting surfaces, read my post on unique painting surfaces.
22. Work on large areas first and then the smaller details. This method will save on paint since acrylics dry so fast, and it is easier to add fine detail on top of the larger background area.
You can also use a thin wash of paint (paint mixed with water) to cover up the white of the canvas before you start the actual painting.
23. Keep two jars of water handy. One for cleaning brushes and one for clean water to dilute your paint. Any jar will do, such as a large mason jar.
You can buy brush basins for cleaning brushes, but they are an unnecessary expense.

24. Purchase a colour wheel to help you mix colours and guide you in deciding which colours you should use in your painting.
25. Don’t be afraid to ask questions. Most paint manufacturers are happy to help if you email them your question.
They also usually have many valuable resources, such as fact sheets and how-to videos on their sites. Below are links to a few.

26. Use the biggest brush you can for the area you are painting. Don’t try to paint a background with a small brush. It will take you longer and leave more brushstrokes in the paint. Use larger brushes for large areas and save the detail brush for the smaller details.
27. You can add contrast to your work by learning about warm and cool shades and complementary colours. Warm colours are reds, yellows, and oranges. Cool shades are blues, greens, and violets. Complementary colours are colours that are opposite each other on the colour wheel, such as red and green, for example.
28. Learn how to do an underpainting. This is a thin wash of colour, usually a neutral or earth tone, but can be any colour. An underpainting is helpful because it covers the white of the canvas and can help you define lights, darks, and midtones.
I have a YouTube video on my channel showing how to do an underpainting.
29. Make colour swatches of your paint so you can see what they look like when they are dry. It is also a good idea to make swatches of your colour mixes, along with a note of the colours and ratios you used to create them. A watercolour pad or mixed media pad is a good place to record your paint swatches.
30. Work from back to front. For example, if you are painting a landscape, start with the mountains or trees in the distance and then paint the objects closer to you.

31. To keep your paint wet on the palette, occasionally spray it with a fine mist sprayer. You can also use a stay-wet palette, which can keep your acrylic paint wet and workable for days.
This guide to different types of paint palettes explains what palettes are and how to make your own stay-wet palette.
32. If you get frustrated and can’t figure out what’s wrong with your painting, there are a couple of tricks you can try. First, take a picture with your phone. The painting often looks different on a phone for some reason, maybe because you are not as close to it and can see it as a viewer would.
Second, turn that picture into a black-and-white photo on your phone. You will be able to see from that photo if your values (lights and darks) are off, and maybe a little tweak in the values is all you need.
If these don’t work, you can try turning your painting upside down. It seems odd, but it often works to give you a different perspective on your painting.
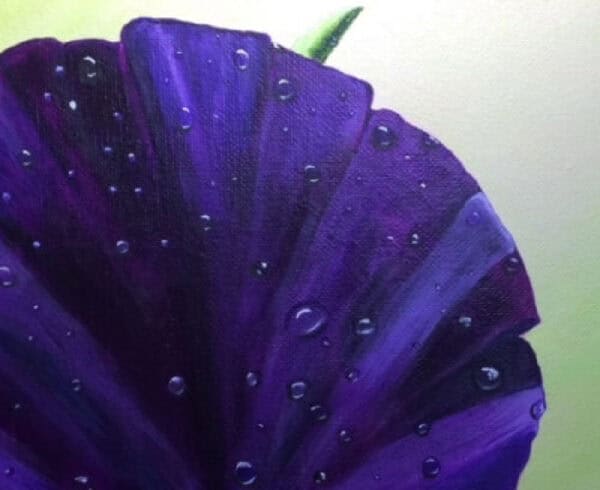
33. Use a reference photo. A reference photo makes it so much easier for beginners to see where highlights and shadows are, get proportions right, and see values more clearly.
34. Speaking of values, it is a good idea to learn about them, what they are, and how to use value in your artwork.
35. Keep a sketchbook. Carry a small sketchbook to jot down ideas or do quick sketches of something you might like to paint later.
36. Understand Colour Theory. Learn the basics of colour mixing and the colour wheel.
37. Join an Art Community. Being part of a group can provide support and constructive feedback. I have a very active group on Facebook that is free to join. Trembling Art Creative Corner is a great group of supportive, helpful artists across all genres.
38. Keep Your Workspace Organized. A tidy space can improve your focus and efficiency.
39. Experiment with Composition. Try different layouts to see what works best for your subject.
40. Embrace Mistakes. Learn from errors and view them as part of the creative process.
I hope you found some of these tips useful in your painting. If you have any questions, I would love to hear from you.
We also have a private Facebook group, Trembeling Art Creative Corner, where you can post your work, ask questions and interact with artists of all levels. Everyone interested in art is welcome. 😊

I enjoyed the article! Great tips! I am truly a beginner; I have only been painting for a month. I love it! It relaxes me and gives me joy. I will continue reading your articles! Thanks!
I’m getting acrylic supplies together and watching all the beginner tutorials l can. Yours has been so helpful and hope to see more from you. Thank you so much. l will be 86 soon and hope to have my first piece done by then.
I appreciate the wonderful information you provided
Hey, thanks for these tips! Curious, how to tell what “professional grade” acrylics are? Is there something in particular to look for, other than a higher price point?
This is a great post!! I was diagnosed with MS and there are times when I feel I have to give up the painting I love to do. This is an inspiration for me to keep going.
Thank you!
Hi Mary; There are many times I feel like this as well but I keep going because I love art. There are lots of physical challenges but the nice thing about art is there are not rules to creating. You can do whatever your body and brain let you do in the moment. I am so glad you were inspired by my post. 😊
It’s great today as anybody can have a go with abstract art years ago you had to study how to draw but today there are many many people giving art a go.
I have been painting ceramics for years, now learning canvas painting. It is hard for me to go from being clean, sharp precise painting . I’m a very critical of my work, and when I get out the “big guns..(.canvas) it’s the opposite. Big long strokes. Also, I have a lot of liquid acrylic paints I use instead of tubes. I don’t want to go out and buy more supplies. I found paint alongs on u tube . I did 4 10×12’s. Learning the background and leading up to the finished project is a wow factor. I wondered why I was doing stuff we couldn’t see at the end, but you can faintly see it, it does make a difference. My paints are liquidy, but I’m having fun. Thank you for your post.