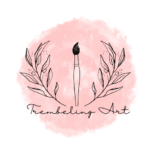

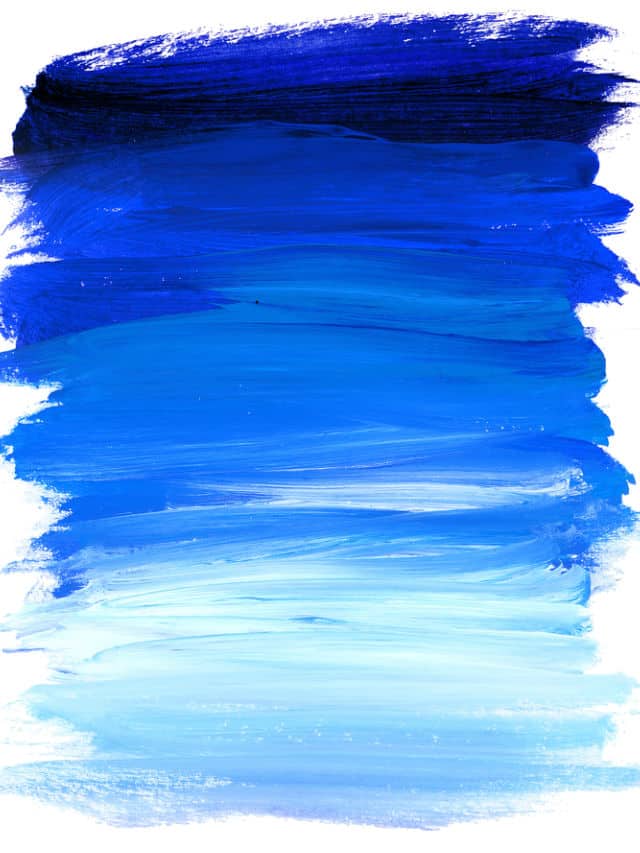
There are many different types and styles of acrylic painting that use visible brushstrokes, from painterly styles with obvious brushstrokes to impasto with thick, heavy layers of paint and many more. But what if you wanted a smoother finish to your painting, such as when painting a portrait or a clear, reflective pond?
It is not always easy to avoid brush strokes with acrylic paint since it dries so quickly. Here are several techniques and tips you can use to avoid these in your acrylic painting.
**This page may contain affiliate links to products I have used or recommend. If you purchase something from this page, I may receive a small percentage of the sale at no extra cost to you. For more information click here.**
#1: Start with a smooth surface
You can buy very smooth canvases, but they do tend to be pricey.
Alternatively, you can use several coats of good acrylic gesso on your not-so-smooth canvas or wood panel. Sand between coats to get the best smoothness, and wipe clean.
You can apply as many coats as necessary to achieve the smoothness you want. If you need more information, I have a post explaining how to gesso a canvas.
#2: Use a soft brush
The texture of the brush you use can also play a part in how streaky your paint becomes.
A stiff, hog hair bristle brush more suited to oil painting will cause numerous streaks in your paint.
A softer synthetic taklon brush is better to use when you want to get a smooth acrylic painting. It should be softer than hog hair but still firm enough to get a good stroke.
You may have to experiment a little to find a brush that suits your style of painting and your type of paint.
Expensive brushes are not necessarily the best, but avoid dollar-store brushes, as they tend to lose hairs that get stuck in the paint.
#3: Use opaque paint
Transparent paint requires several coats to get good coverage, which increases the likelihood of streaks or ridges in your painting. Opaque colors require fewer coats and reduce the risk of streaking.
If you need to use a transparent color, you can add a tiny bit of opaque color, such as white, to make the paint more opaque. You could also do an underpainting to give your transparent paint a base.
If you like to paint in thin washes of color as I do, you may need to practice a bit to get used to how the paint moves on the surface and how it works with the brush you are using.
#4: Paint in thin layers
A heavy layer of thick paint will almost guarantee ridges in your painting. Use only enough paint to cover the area you are painting.
If you get a little too much on there, wipe it off with a damp cloth while the paint is still wet and start again.
Acrylic paint dries slightly darker, so you may not need as much paint as you think to achieve the depth of color you want.
#5: Try fluid acrylics
Heavy-body acrylic paints are thicker and retain brushstrokes.
Fluid acrylics or soft body acrylics are thinner and, therefore, don’t retain the brushstrokes as well. They glide on more smoothly and can be blended more easily on your canvas.
Fluid acrylics contain the same amount of pigment as heavy body paint, so your color depth will not be compromised.
Some brands of fluid acrylics may dry a little faster than heavy body acrylics, so you may have to work more quickly.
See my post on how to keep acrylics from drying too quickly.
#6: Use a flow improver
A flow improver is a type of additive that helps to reduce the viscosity of acrylic paint.
Flow improvers or flow aids break the surface tension of the water contained in the paint and thin the paint without thinning the color. They also slow down the drying time of paint, giving you more time to blend out streaks and ridges.
Flow improvers are usually mixed with water or added to your brush water. Read the instructions on the bottle for the mixing ratio because each manufacturer has a different ratio.
Too much flow improver can cause issues with your paint sticking or not drying at all.
#7: Use water to thin your acrylic paint
Use water to thin your paint a little and improve the flow and glide of your paint.
Using too much water can prevent your paint from sticking and, in some cases, even lift the layer of paint underneath, so only use as much as you need to get the effect you want.
Water will also dilute the color of the paint a little.
Thinning with water is very useful to paint details such as eyelashes and thin lines. You can thin the paint to an inky consistency and use a liner brush for these details.
#8: Make sure your brush is fully loaded
A bare brush swiped over wet paint will leave streaks. A brush that isn’t fully loaded will do the same thing.
Fully load your brush with paint but not right up to the ferrule (the metal part that holds the bristles together). Getting paint into the ferrule can cause your bristles to separate over time.
If your paint is thick or a little clumpy, swipe your loaded brush on your palette to get a smooth gradient of paint.
#9: Blend brushstrokes with a soft brush
Blending is important with any medium but can be especially difficult with acrylics because of their fast drying time.
Use a soft mop brush to blend out your paint before it dries. A very light touch with a mop brush can blend out any visible brush strokes when the paint is still wet.
I use several cheap makeup brushes for blending because I find the bristles don’t fall out nearly as often as they tend to with mop brushes. I keep several handy during any painting session.

#10: Mist the paint with water
Mist your paint and your canvas with water while you are painting to keep the paint moist enough to blend. Use a “mister” rather than a spray bottle to avoid large water drops on your painting.
A well-cleaned perfume or body spray bottle has the right type of spray to get just a light mist.

#11: Use the right brush
Use the right brush for your painting area. Painting a small #2 flat over a large area will create ridges and take much longer.
Use the largest brush that will fit the area you are painting. Your painting will go much more quickly and have fewer stop-and-start ridges.
#12: Use clean brushes
Clean your brushes well after each painting session to keep them in good shape. Dried paint can separate the bristles and leave marks in your painting.
Also, dried paint tends to flake off the bristles as you are painting and get lodged in the wet paint.
See my post on cleaning brushes to learn how to take care of your brushes properly.
#13: Add water to your brush
Having water on your brush before you dip it into your paint will help the paint glide more easily across your surface.
Don’t let it drip wet, as this dilutes the paint. Just dip it in the water and wipe it on the edge of your water jar to remove the excess.
That little bit of water also helps to soften up the bristles and make blending easier.
#14: Don’t press too hard
Don’t use too much pressure when applying paint. Scrubbing your paint into the canvas will leave streaks and ridges as well as damage your brush.
A light touch helps to glide the paint onto the surface in a smooth blending motion.
If you see little white dots on the canvas showing through, you need more paint on your brush or better paint (artist grade vs. student grade).

#15: Don’t keep brushing over the same area
Don’t keep brushing over the same area of wet paint. Apply your paint, blend if needed, and let dry.
If it needs another coat, you can go over the area once it is dried. This will minimize any brush strokes appearing in your finished painting.
#16: Use an airbrush
If you happen to have an airbrush, you can use this in two ways.
1.)The airbrush can be used to apply a smooth base layer of paint before you get into the details. You can use acrylic paint mixed with an airbrush medium or acrylic airbrush paint.
Lightly spray your background and let it dry before continuing. This method can produce some lovely, soft, smooth backgrounds.
2.) Another use for an airbrush is to lightly mist your painting with water to keep the acrylic paint wet and workable for longer.
This is really useful if you are painting on a large canvas. The airbrush helps to keep a large area wet longer so you can blend more easily

I hope these tips were useful and helped you achieve the results you are looking for. Practice is still the best way to learn to achieve a smooth finish in your painting.
Experiment with paint brushes, mediums, and different surfaces to see which ones you most like working with for your type of painting.
As always, if you have any questions or further tips please leave a comment below.
Follow me on social media, sign up for my newsletter, or join our private Facebook group Trembeling Art Creative Corner for more tips and ideas. Happy painting. 😊
Thanks for reading.

Thank you for this tutorial. It has been very helpful.
I made the terrible mistake of mixing my acrylic paint with a glossy medium for the background of a painting I’ve started. I don’t like the gloss. Can I sand the canvas & start over using my acrylic paints? Thank you
Hi Linda. Sorry for the late reply. You can absolutely sand the painting down and start over. I would recommend giving the painting a coat or two of gesso to cover up the previous painting and give your acrylic paints a little something extra to adhere to. I hope this helps. Happy painting. 😊
Really good tips here. I have a mop brush, but have not used it in quite awhile. That thing was so hard to clean I may have given up using it. Also regarding the airbrush, I never would have thought of that one – wow. That would be great for the background…
0hi thank you for all the tips on painting.i shake a lot. Is there something i can use so i can make a straight line? Like there are lots of staight lines when painting houses. If you know of something that could help me please let me. Thank you in advance. Have a good day.
First thank you for your cooperation.
Second I want to know how to get a look of an oil painting finish by using acrylic paints.
Thank you and waiting for your feedback.
I am so happy to get the helpful information from your site. It’s very helpful for those who are trying to learn the art of acrylic painting, and brushstroke tips are a must-read if you want to improve your artwork. I love the way it talks about different techniques and their applications in each chapter. Thanks for sharing this with us!
Great tips and tricks! Here is a very helpful technique I didn’t read above. In addition to an existing section on blending, when blending color to color, tone to tint, etc, do not leave ‘hard edges!’ hard edges are the most difficult to blend into. Have to stop in the middle of a section to mix more paint or simply because you’re all out? not to worry, even with no expensive mediums, with or without water, push those edges as far as the image will allow and you’ll have a MUCH easier time continuing smoothly regardless of the short or long pause. This tip combined with the above tips mentioned you’re certain to leave no mark behind! haha
-Cheers! I hope this helps you or many by making it onto your site somewhere, haha.
Thanks for the advice to avoid too much pressure. My aunt wants to find an art supply store so she can try acrylic painting. Your tips should help her paintings looks better from the start!
Very helpful information. Thanks so much!!
this was really helpful
🙂