

There are many reasons to varnish your acrylic painting, although some artists are adamant that acrylic paintings should not be varnished.
Varnish protects your porous acrylic painting from dirt, dust, UV rays, and yellowing. It also unifies uneven tones caused by using various mediums and water in different areas throughout the painting.
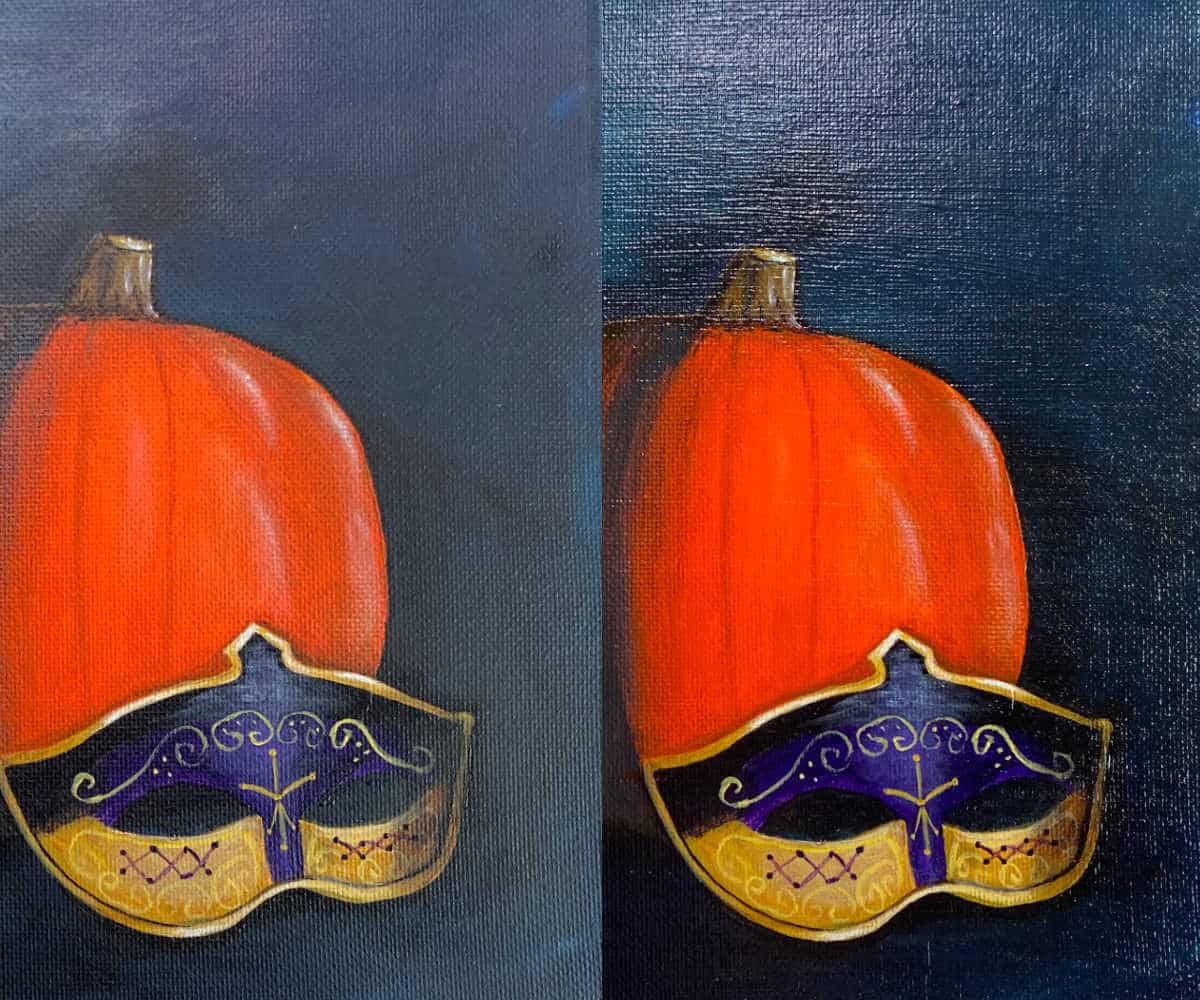
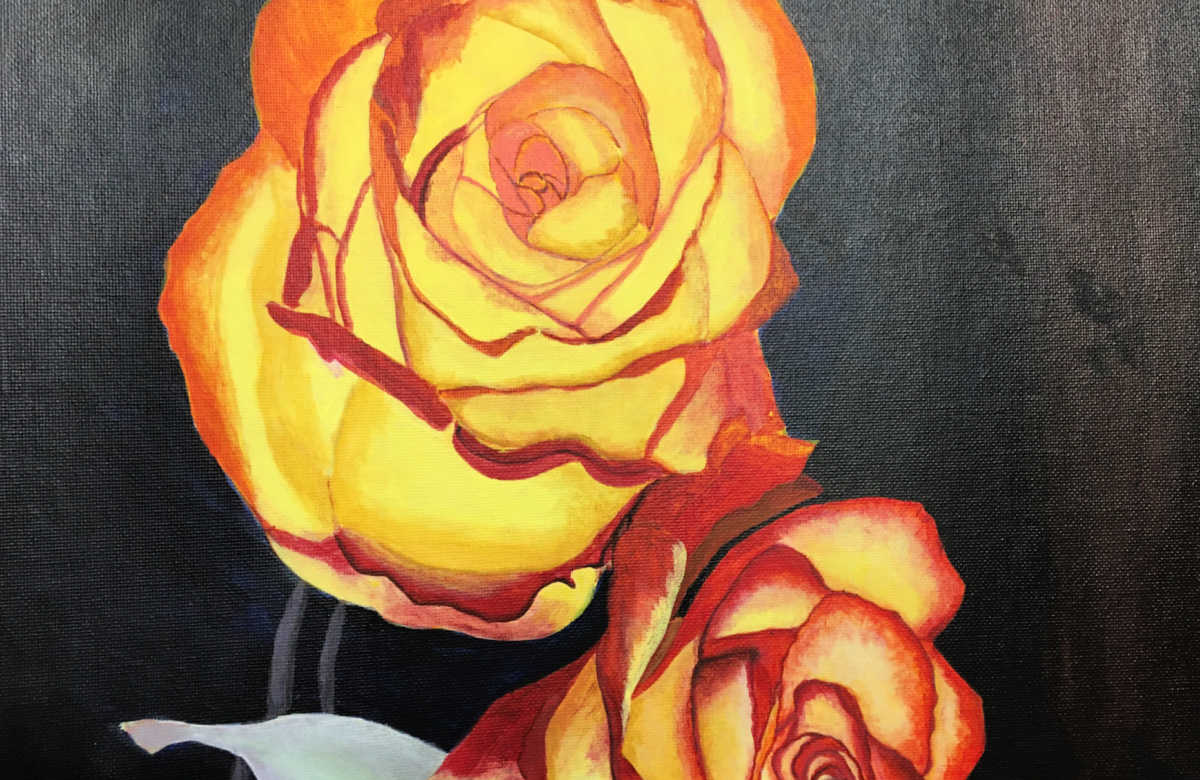
Acrylic paint tends to dry a little flat but a good gloss varnish can enhance the vibrancy of the colors in a painting, especially dark colors mimicking the glossy finish of an oil painting.
A matte varnish can soften the colors in a painting. However, it is not a good idea to use matte varnish on a black background, as it can leave the paint with a milky appearance.
This post may contain affiliate links. If you click a link and buy, I may receive a small commission. Please see my full privacy policy for details.

Different Types of Varnish
Varnish comes in gloss, matte, and satin varieties and can be either permanent or removable.
There are many different brands on the market. Each brand has its own application method, so read the directions before proceeding.
The different types of varnishes can be mixed together or applied one on top of the other to get the effect you want in your painting.
Matte and satin varnish can, in some cases, make the paint appear slightly lighter. Gloss varnish can enhance the depth of color, especially dark colors, making them “pop.”
Varnish comes in jars or spray cans. There are pros and cons to each one.
I like to give the painting a light mist of spray varnish and then go over it with a brush application of a couple of coats of gloss varnish.
I find it easier to avoid brush strokes and bubbles this way.
There is also less chance of some paint coming off and mixing with the varnish. This can happen if you have used a lot of water to thin down your paint or if your paint is not completely dry.
When you apply it, the varnish will typically appear cloudy or milky but it will dry clear.
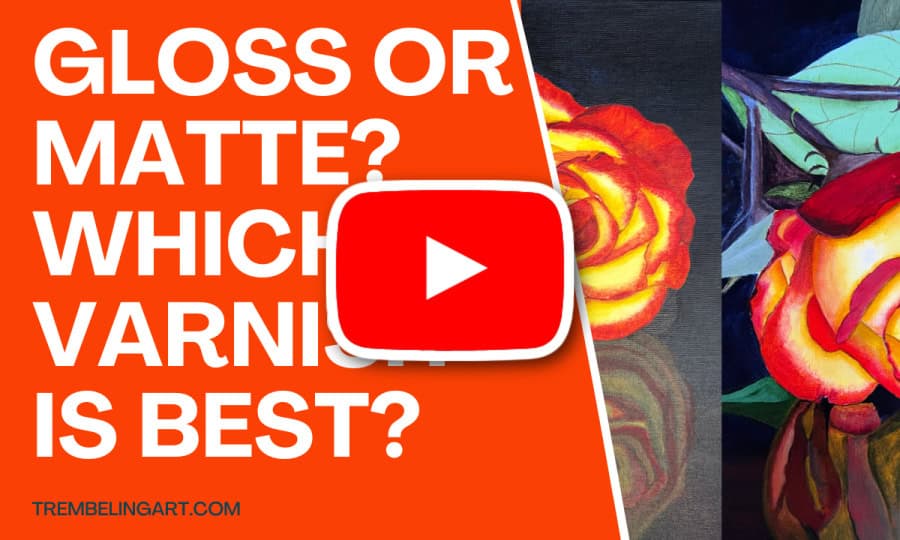
I also have a video on the difference between matte and gloss varnish. You can view the video by clicking the link below.
If you like the video and want to see my future videos, please like and subscribe to my channel. 😊
Note: Do not use Mod Podge or other craft finishes to varnish your painting. They aren’t archival and will turn yellow over time. They are also not a permanent finish and can easily be softened by water or even excess moisture in the air.

Before You Varnish Your Acrylic Painting
Before you varnish an acrylic painting, make sure that it is dry. This could take a long time for oils, but it usually takes a day or two for acrylics.
I like to wait at least a week, especially if the humidity is high.
If you have done a heavy impasto-type painting, you may want to wait a few weeks to ensure all the layers are dry.
Also, before you varnish, sign your work and take photos or scans. Varnish, even matte varnish, will cause a glare that can be hard to work around to get a great picture.
If you would like some tips on taking photographs of your artwork read this post 8 Simple Tips to Photograph Your Art.
Isolation Coat (Optional)
An isolation coat is a permanent coat of varnish applied to a finished painting before the top varnish coats. It acts as a barrier between the paint layer and the varnish layer. It is an optional step that not all artists consider necessary.
You may want to apply an isolation coat for a couple of reasons.
1. If you think the top layer of varnish may need to be removed later due to damage or for cleaning, the isolation layer will protect your work.
Acrylic varnishes are typically polymer-based and permanent, so they cannot be removed. Oil-based varnishes, like those typically used in oil paintings, can be removed with ammonia and should only be done by someone who is experienced in this type of work.
2. Using a matte varnish on a bare painting can sometimes make the painting appear cloudy.
This happens because the varnish agent can be absorbed into the painting, leaving the matte agent, which is typically white, sitting on the surface.
An isolation coat will prevent this absorption.

You can apply one or two coats of varnish for your isolation layer and leave it to dry for 24 hours before continuing with your top coats.
Use a non-removable acrylic varnish for your isolation coat. Liquitex varnish is a good choice for this. It is a permanent acrylic polymer that won’t yellow over time.
Once the isolation coat is dry, you can cover it with 1-2 layers of varnish. If you want to remove the varnish later, you will have to use a removable varnish such as Soluvar from Liquitex.
Removable varnishes are solvent-based but safe for use on acrylic and oil paintings. Be sure to use them in a well-ventilated area.
Make sure your work is clean and dust free and use distilled water for mixing to ensure no dust or tiny specks get embedded in your finish.

Varnishing Supplies
To varnish your acrylic painting, you will need a large, flat brush that isn’t too stiff. I find old, worn-out brushes work best.
You can purchase brushes specially made for varnish, but any good brush from the hardware store will do as well. Snip the ends of the brush slightly to give it that worn feel and prevent brush strokes.
Make sure the bristles don’t come out easily and get stuck in your varnish. Keep this brush strictly for varnishing to prevent contamination with paint.
You will also need a jar for mixing varnish if necessary, some paper towels or paint rags, something to protect the surface under your painting (I usually use cheap garbage bags from the dollar store), distilled water, and a stick or palette knife to stir the varnish.
Steps to Varnish an Acrylic Painting with a Brush
Varnish should be applied in one or more thin coats. Thick coats can cause runs or pools of varnish on the surface and an uneven finish.
There are many different ways to apply acrylic varnish. Some artists use paint rollers, sponge brushes, various types of sponges, or even an old t-shirt. I prefer to use a brush, and I have found this to be the best way to varnish my paintings.
1. Start by deciding whether to use a spray or brush. A brush is fine for flat, smooth surfaces.
Sprays work better for impasto or textured surfaces than brushes, which can leave little pools of varnish in cracks and crevices.
2. Wipe off your painting and check to make sure there is no dust or dirt on it.
3. Protect your surface with garbage bags or drop cloths.
4. Lay your painting on a flat surface. Placing it upright on an easel can cause runs in the varnish.
If you are varnishing a canvas board or will be varnishing the sides of your canvas, put something under it to raise it slightly off your surface.
I use four dominoes on smaller works and a large tub of gesso or two with a board propped on top for larger pieces.
5. Read the directions on your bottle of varnish. Methods of application, mixing instructions, etc., all vary between types of varnishes and brands.
6. Pour your varnish into a dish that is at least the width of the brush, which should be two inches or larger.
The best thing to use for this is old glass or ceramic serving dishes I have picked up at yard sales. ( I love to recycle. 😊) They are usually big enough and easily cleaned.
If your varnish does not need to be mixed with water, you can pour a small amount directly onto your painting and spread it out from there.
7. If you are doing an isolation coat first, mix the varnish with water according to the manufacturer’s instructions. Stir gently!
Vigorous stirring or shaking can cause bubbles and foam to form.
8. Dip your clean brush into the varnish about ¼ to 1/3 of the way up the bristles. It is best to use a brush only used for varnish.
The chemicals in the varnish can loosen dried paint and cause specks and discoloration in your varnish.
Apply the varnish. Use a soft-bristled brush to apply the varnish in long, even strokes. Start at the top of the painting and work your way down, being careful not to miss any areas.
Apply the varnish in thin layers rather than one thick layer to prevent dripping or pooling.
Acrylic varnish dries quickly so you need to work quickly. Cover the entire paint surface. Try not to brush over a partially dry area because you will have visible brushstrokes and the varnish will become foggy.
( A second coat is optional, but I prefer multiple thin coats).
10. Allow this first coat of varnish to dry. The drying time will depend on the brand and type of varnish you use, but it usually takes a few hours. Make sure the painting is in a well-ventilated area during this time.
11. Apply a second coat of varnish in the opposite direction of the first. This will help ensure that you don’t miss any areas.
12. Allow the painting to dry flat, away from anything that stirs up dust or might inadvertently fall on it. It is also a good idea to keep pets away from your painting.

Spray Varnish For Acrylic Paintings
1. Follow steps 1 to 5 above.
2. Shake the can of varnish vigorously. This step is important to make sure all of the chemicals have been mixed, and you get a satisfactory finish.
Shake again every few minutes while you are spraying.
3. Spray a little on an old piece of canvas or a board to make sure the varnish is flowing properly, and the nozzle isn’t spitting.
Keep a rag handy to wipe the nozzle and spray on the scrap canvas during the varnishing process.
4. Hold the can away from your painting at a distance the manufacturer recommends (did you read the instructions?).
It is usually around 30 cm (about 12 inches). Holding the spray can too close will create “hot spots” on your painting, where more spray is concentrated in one area.
5. Begin spraying off the edge of your canvas and spray past the other end so there are no obvious stop-and-start lines.
Spray evenly and lightly. Two to three coats should be enough to protect your painting, but you can do as many as you want, depending on the effect you want.
6. Clean your spray nozzle well to avoid clogging when you want to varnish another painting.
7. Spray varnish dries quickly, but I still like to let mine cure for a week or two just to be sure.
If you are varnishing an acrylic painting for the first time, it might be a good idea to practice on a practice canvas.
You can get used to the distance for spraying and the pressure needed to get a smooth finish with a brush. You can also see which type of varnish you prefer: matte, satin, or gloss.
FAQ
- Do You Put Varnish Over Acrylic Paintings?
Yes. While acrylic paint is basically plastic, it is porous when dry. Dirt and dust can settle in these pores and is very difficult to remove. Varnish provides a protective layer and seals the pores, making cleaning easier.
Varnish also protects against UV rays that cause fading and yellowing, enhances color vibrancy, and evens out the colors and tone of the painting.
- How long before you can varnish an acrylic painting?
Acrylic paint dries very quickly, but even though it may feel dry to the touch, there may still be spots that are not completely dry. This is especially true if there are many layers of acrylic paint or the paint is thick, such as when you use an impasto technique.
It is best to wait a few days or weeks before applying varnish to your painting. I like to wait until I have several paintings ready to varnish, then set up an assembly line of sorts and varnish them all at once.
- Do you spray or brush acrylic varnish?
Acrylic varnish can be purchased in jars of liquid or cans of spray. You can use either one or both, depending on the texture of your painting and the desired finish.
If you have questions, you can leave them in the comments below. You can also join our free Facebook group, Trembeling Art Creative Corner, where you can ask questions, post your work and get to know some fantastic artists from all genres and skill levels. 😊

Do you have a spray varnish brand you like? I’ve been using modpodge since I’m starting out, since I had it on hand and I was nervous about using a liquid one (I’ve had issues with it still smearing fully cured art, since I incorporate acrylic pens).
Hi Anna; I use Krylon spray varnish. It is reasonably priced and won’t yellow. However, I have still occasionally had issues with smearing when I use pens. It doesn’t happen every time, just occasionally. I don’t know why. I lay the canvas flat and do a very light coat at first and let it dry before adding another coat. That seems to minimize any smearing. I hope this helps. 😊
I recently started painting Matryoshka’s (Russian nesting dolls)
I want to seal my projects. Should I use Modge Podge, varnish or stain? I don’t want colors changed, however, I know the wood and painted surfaces need to be sealed.
Hi Pam; I would use varnish. Modge Podge will yellow over time and tends to get soft and sticky if it gets wet or even damp. A good archival varnish will keep your beautiful work looking like new. 😊
Does it matter if you use oil based or water based varnish on acrylic and oil paintings? I have been told when painting you should not paint acrylic over oil so would this also apply to varnish? In other words would painting a water based varnish over an oil painting be okay? Or alternatively would painting an oil based varnish over an acrylic painting be okay? Thank you for your help. Blessings, Gloria
Hi Gloria, You can use an oil based varnish over an acrylic painting, just make sure the painting is completely dry first. You should not use acrylic varnish on an oil painting. Acrylic varnish is water based and would sit on top of the oil. Over time it may peel off or crack. It is better to use an oil based varnish on an oil painting.
What brand of varnish have you had the most success with? I have been experiencing cloudiness and dullness on the finished painting. I am using Liquitex Satin and applying with the flat side of a black foam brush about 3 inches wide. I did notice your comment about not re-stroking over a part of the canvas you have already coated. I did do this; it wasn’t tacky yet, but maybe that still contributed to the problem? I am a newbie so any suggestions are appreciated!!
Hi Mary, I use Liquitex Gloss Varnish. If you are using a satin or matte varnish over a dark painting, one that has a lot of black or dark colors you will sometimes get a milky or cloudy appearance. This is because some of the chemical agents, such as the matting agent, are white. So even though it dries clear, it is not 100% clear and will show up cloudy on a dark painting. A gloss finish will work better on a darker painting and will enhance the colors. Hope this helps. 😊
I vanished acrylic painting which was a landscape painting with a vast colors of green. The next day returning to the studio I was disappointed. The varnish flatten the colors and I lost the contrast between light and dark values. Also I lost the difference of warm and cool colors. . Most important I lost 2 days of work and I can’t return and repaint it since it 600 miles away. I WILL NEVER VARNISH AN ACRYLIC PAINTING AGAIN. Afterwards I heard the same problem from other artists.
How much varnish would I need to cover a 4ft by 6ft painting?
only a pint. it goes miles. buy a qt and learn the expected need for next time
What is the best method to store many tole paintings?