Learning to paint with acrylics is an ongoing process. Mastering new acrylic painting techniques opens the door to a varied portfolio of artwork.
Over time you will develop your own style of painting, but to begin with, mastering a few different techniques will get you started and you will be more satisfied with your work.
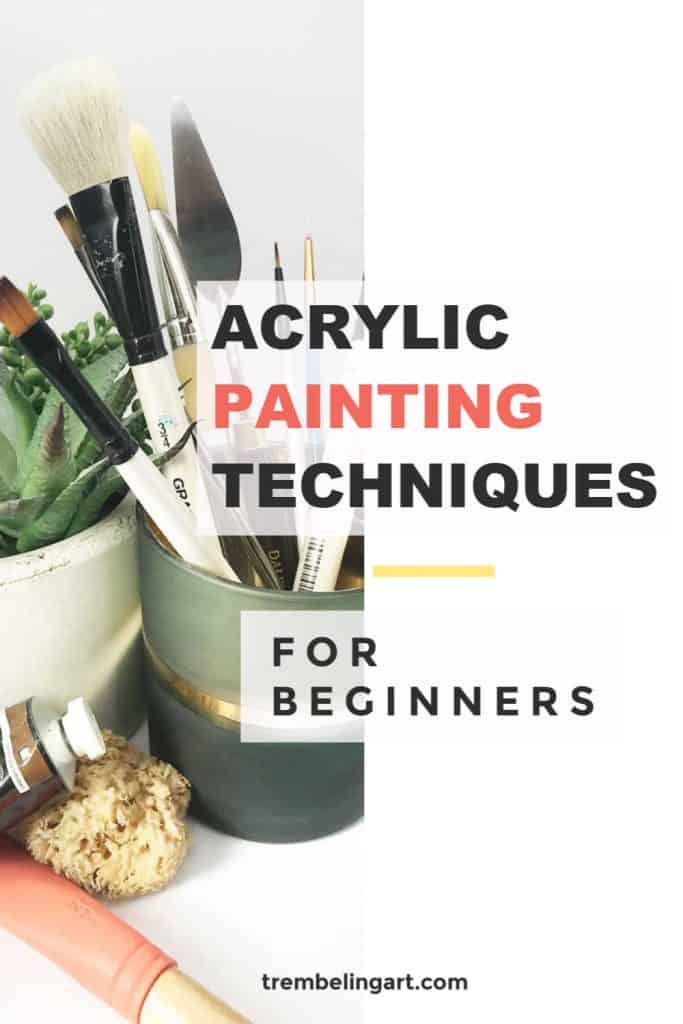
Below are a few basic techniques that are a good starting point for beginners. Practice, experiment and learn while having fun and enjoying the satisfaction and creative process with these simple acrylic painting techniques.
This post may contain affiliate links. If you click a link and buy, I may receive a small commission. Please see my full privacy policy for details.
Basic Acrylic Painting Techniques
Dry Brushing
Dry brushing is done like it says…with a dry brush. That means using straight paint with no water. It is used for highlighting or adding a hint of color to something.
Add a small amount of paint to your completely dry brush. Dab the brush gently on a paper towel to remove excess paint.
Lightly sweep or dab it over already-dried paint to add highlights or texture to things like tree trunks to give the illusion of snow or light.

Washing or Glazing
Acrylic paint can be watered down to create a thin, transparent wash of color. The effect is similar to watercolor and gives soft transparent layers of color that are useful for deepening shadows or slightly altering the color of the underpainting among other things.
You can use water to thin the paint or you can use a variety of glazing liquids available to give different effects. See my post on acrylic mediums.
Be careful when adding water to your paint. Too much water can cause the paint to lift off the surface. You just need to thin it to an inky consistency
A wash can be done over large areas to cover an entire canvas or it can be used in select areas to create shadows.
To get the best results from your wash or glaze use thin layers.
Unlike watercolor, thinned acrylic paint cannot be regenerated when dry and is permanent.
Stippling
Stippling is a technique similar to Pointillism, which is usually done with pencil or pen. Pointillism involves using tiny dots to create a shape or to shade particular areas.

This technique can also be done with paint and a brush.

Stippling is a great way to add texture and dimension to your painting. It is a useful technique for trees and bushes among other things.
The technique involves using a stiff brush dipped in paint and then lightly dabbed on the surface.
Hold your brush upright and use only the tips to produce tiny dots of color. Press more firmly to get larger blob like texture depending upon what you want to achieve.
You can use several different colors to give the illusion of depth and shadows. You can also do an entire painting using this technique.

Splattering
Splattering is a fun but messy technique to get a starry night effect or falling snow among other things. It is also widely used in abstract art to get those wonderful pops of color.
To splatter, thin down your paint with water and load your brush.
Either flick the brush or tap the handle using another brush depending on the effect you want. You can also flick the bristles with your finger.

An old toothbrush dipped in paint is another way to get a splattering effect. Just pull back the bristles with your thumb or finger to create the effect you want.

Splattering requires a little practice. If the paint is too thin you will get blobs of water on your surface. If it is too thick you will have trouble getting any splatter.
It is messy so cover surrounding surfaces. You can also use stencils to confine the splatter to a certain area or create a pattern. This technique is a lot of fun.

Detailing
To get fine thin, fine lines such as for eyelashes, tiny flowers, trees, or lines on a sailboat you need a small, fine detail brush.
It is easier to paint details with paint that has been thinned to an inky consistency. It flows better off the brush and gives a more consistent line and better control when painting small details.
A detail brush with long hairs, referred to as a “rigger”, works best for thin lines. It holds more paint than the shorter haired detail brush so you can get a longer more consistent line with one load.
I use shorter-haired detail brushes for tiny dots of color such as a twinkle in an eye or for shorter strokes like rain.

Using detail brushes also take a bit of practice. A light touch will give you a fine line. The harder you press the thicker the line.
You can also achieve details using small round brushes. These are great for making thicker lines like fence posts or slim tree trunks.
Since I have Parkinson’s, getting fine details in my painting takes a lot of trial and error.
I usually lay my canvas on a flat surface for this and make sure it is completely dry before starting the details.
I keep a wet cloth handy to erase mistakes and rest my arm on the table to minimize tremors. Sometimes I use a ruler or masking tape as a guide.
For working at an easel I use a modified maul stick (or mahl stick).
A maul stick ( pictured below) is just a stick about 3 feet (1 meter) long with a soft covered ball at one end. You can lay it against your canvas and use it to steady your hand.
I made my own modified one which is about 5 feet (1.5 meters) long with a tennis ball covered in leather on one end. This is so I can hold it between my knees to steady it since my left hand does not cooperate most of the time.

Wet Blending
Wet-into-wet blending or alla prima painting, is a popular technique in oil painting. It is much harder to achieve with acrylics since they have a shorter drying time than oil paints.
You can achieve wet into wet blending by applying one color on top of another while both are still wet or by applying them next to each other and blending to form a gradient.
Make sure you use a wet brush to prevent the paint from dragging rather than blending.
Adding water or acrylic retarder to the paint will help keep it wet and blendable a little longer. Misting the paint lightly with a spray bottle also helps.
This technique can give a beautiful softly blended background to abstract paintings.
Sgraffito
Sgraffito comes from the Italian word sgraffire which means “to scratch”.
The technique involves scratching through the top layers of paint to reveal the paint colors below.
The top layer should still be wet when doing this but the layer underneath should be completely dry.
It is useful for adding highlights into hair or adding thin blades of grass or twigs in a landscape but you don’t have to limit your technique to these.
The creative possibilities for sgraffito are endless.
You can use sgraffito to create words or designs in your piece, multiple different colors to give variation, or any type of medium to get more texture or special effects.
You can use any object to do the scratching such as the end of your brush, a credit card or even a stylus.
There are also numerous silicone or rubber tools available to create interesting textures and designs.

Be careful not to puncture your canvas or tear your paper with whatever tool you use.
This technique is really a lot of fun to do and is an ideal way to get children interested in painting.


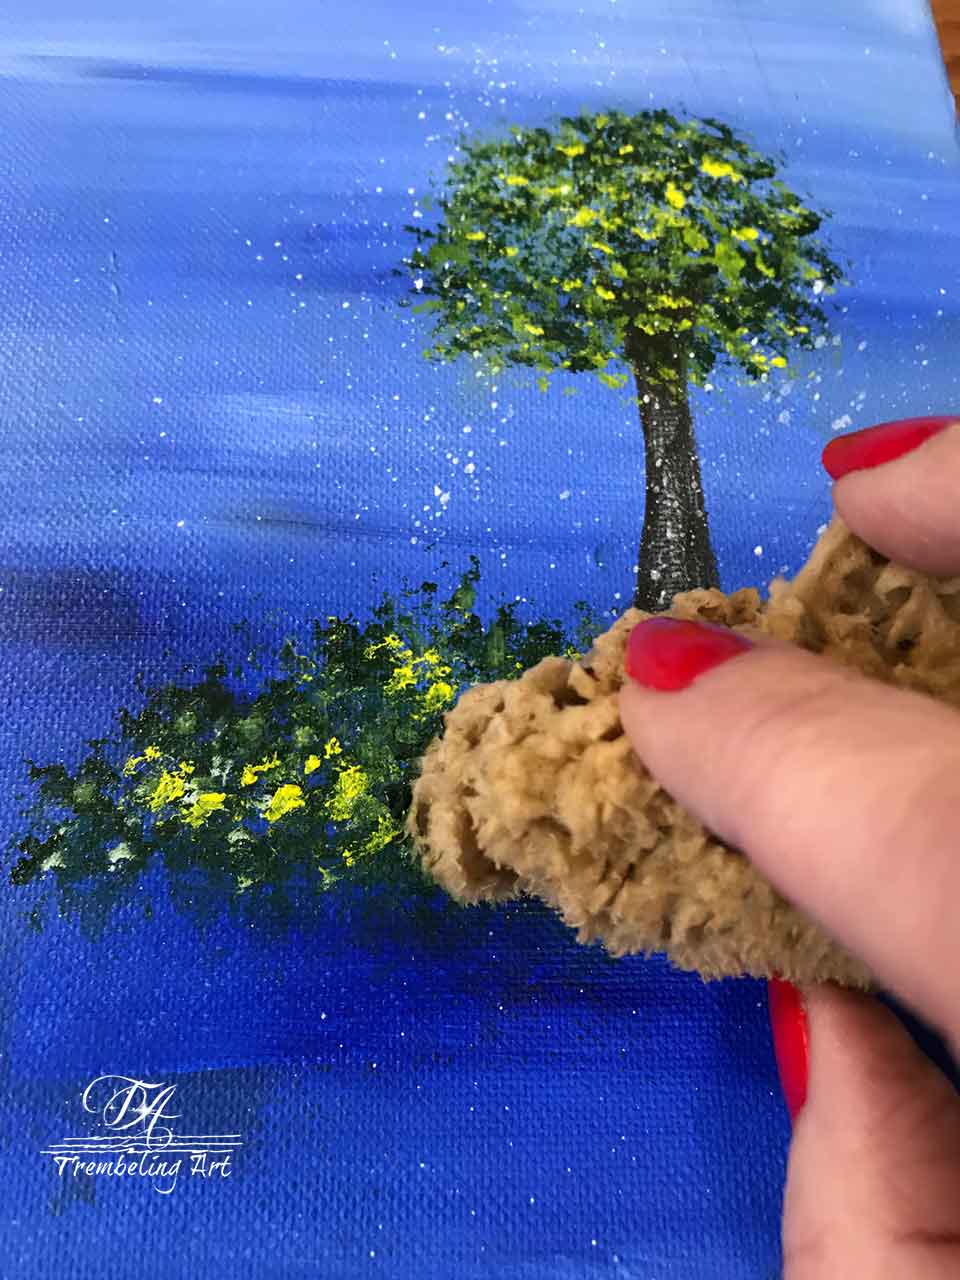
Sponging
Sponging is done by dabbing paint onto the surface with a sponge.
A sea sponge works best for this since it can be easily torn into various shapes and can hold a lot of paint.
This technique is a great way to paint foliage or loose, hints of shape in the background.
Sponging over a lighter or darker color will give you a beautiful and interesting background for abstract painting or any painting where you do not want details in the background.
Using a sponge can give you a lot of texture or you can use the sponge to gently blend wet into wet to get a subtle gradient.
Painting Knife
Using a painting knife or palette knife is thought of as a technique for more advanced painters but it is pretty easy to use once you get the hang of it. There are many acrylic artists who use painting knives exclusively in their work.
Painting knives can be used to make broad, sweeping strokes across the canvas, add snow to mountain tops or paint the mountains themselves among many other things.
The thin, straight edges of the knife make them perfect for making short, thin lines for trees or grasses or anywhere a line is needed.
A painting knife is great for building up texture in particular areas of your painting or for scratching paint off sgraffito style.

For more information on how to use a painting knife check out my post on Palette and Painting Knives.
Texture
There are several different ways you can build up texture with acrylic paints.
The easiest way is to use thick layers of heavy body paint. You can use a palette knife to apply the paint for things like mountains or abstract shapes. You can also use the thick paint to show visible brush strokes similar to an oil painting.
There are also mediums available such as texture paste, that you can add to your paint to create more texture.
Building up areas of your canvas with a thick layer of gesso before you even start your painting can also give you some interesting texture.
You can also use acrylic additives like mica powder, beads, or sand to get a variety of textures in your painting.
If you intend to add a lot of texture to your painting it is best to use canvas boards rather than a stretched canvas because the weight of the texture can make the canvas sag.

I hope these techniques will help you through your painting process. As with everything, practice is the key.
The more you paint, the better you become and the more you will enjoy being an artist.
If you have any questions or suggestions, leave them in the comments below.
You might also enjoy our Trembeling Art Creative Corner private Facebook group where you can post your work and ask questions.
Thanks for reading. 😊

Hello, I am practically a beginner, I love painting, mixing colours, giving a new look to old things, just for myself, a mind relaxing hobby. Today , 16th april by chance I came across Trembling Art. I have lots to study and practise. TODAY I am a happy senior.
Rita
Thank you so much Rita! 😊
Thank you for all of your handy tips and getting me started again.
Marilyn ♥
Thanks for your instructions and suggestions!
Thank you, I have been enjoying painting for a year now, starting with watercolours
, but it’s been a transition switching over to Acrylics. It’s taking some time with getting to know how to use water!? I just bought a bottle of Liquitex Acrylic medium, flow and additive. When do you use it?
Hi Janice, Flow Aid thins out the paint a little so you get less brush strokes. It also slows down the drying time of your paint which makes it easier to blend. Dilute it with water before adding it to your paint. Liquitex has a great article on there site about flow aid and how to use it. Here is the link https://www.liquitex.com/row/products/professional/gessoes-mediums-varnishes/flow-aid-additive/. I hope this helps. 😊
Marilyn… I related with Janice’s comment above and was glad to see the link you recommended, and provided, on Liquitex. I read recently where you can add up to 25% water with the slow dry Liquitex medium, but that just opened up more questions for me. So, you add water to the product, and then mix that with your paint… so… you need to use the same ratios throughout what you paint, or the finish, when dry, won’t be consistent, right? I’d love to take a class, but there aren’t many options where I live. Tutorials help but you can’t talk to them real-time and ask questions. But… I will preserver, as I did with alcohol inks!! Take care!! 🎨🙃
Hi Janice… pretty much the same here, ‘cept I got my start with alcohol inks. Giving acrylics a try was a totally different thang… but, I was game! There’s thin, medium and thick acrylics… with different finishes and other mediums that can be added to give different finishes and textures. It’s a lot to take in and then apply what you think you grasped!! Marilyn’s article did help to shed more light on acrylics… and every little bit helps! 🙃🎨
Dear Marilyn
I learned a great deal from your instruction. I will check out the links you have provided. Thank you !
Thank you for a most interesting tweet. I really appreciated your tips.
I am a late in life painter and due to various circumstances wasn’t able to paint for a couple years. This was a great article for me for where I am right now. I’m grateful I happened on it.
Thank you. Very helpful as I am very new to painting with acrylics and need all the help I can get!
Thank you very much. I enjoyed reading this article.🙂
Thanks Marilyn for your helpful hints, it is very appreciated.
Thank you so much Jean-Maurice! 🙂