
So, you’ve found the perfect reference photo and can’t wait to start your painting. But what is the best way to transfer a reference photo to a canvas so you can paint your masterpiece?
There are several methods to do this, depending on what you have available and how much time you have. Here are a few that I have used.
You will first need a reference photo, perhaps your favourite photo of your pet or a photo from vacation. If you haven’t found your perfect reference photo yet, check out my post on where to find free reference photos.
This post may contain affiliate links. If you click a link and buy, I may receive a small commission. Please see my full privacy policy for details.
The Debate Over Transferring a Reference Photo to a Canvas
There is some debate among artists about the best methods for transferring your reference photo.
Some say a true artist shouldn’t use any method other than drawing. Some even frown on the use of reference photos.
I believe there is much more to painting than just drawing your reference, so it really doesn’t matter.
Modern equipment and techniques have made it much faster to get your idea on canvas, but a good painting also involves understanding colors, tones, shadows, and highlights, as well as a whole host of other things.
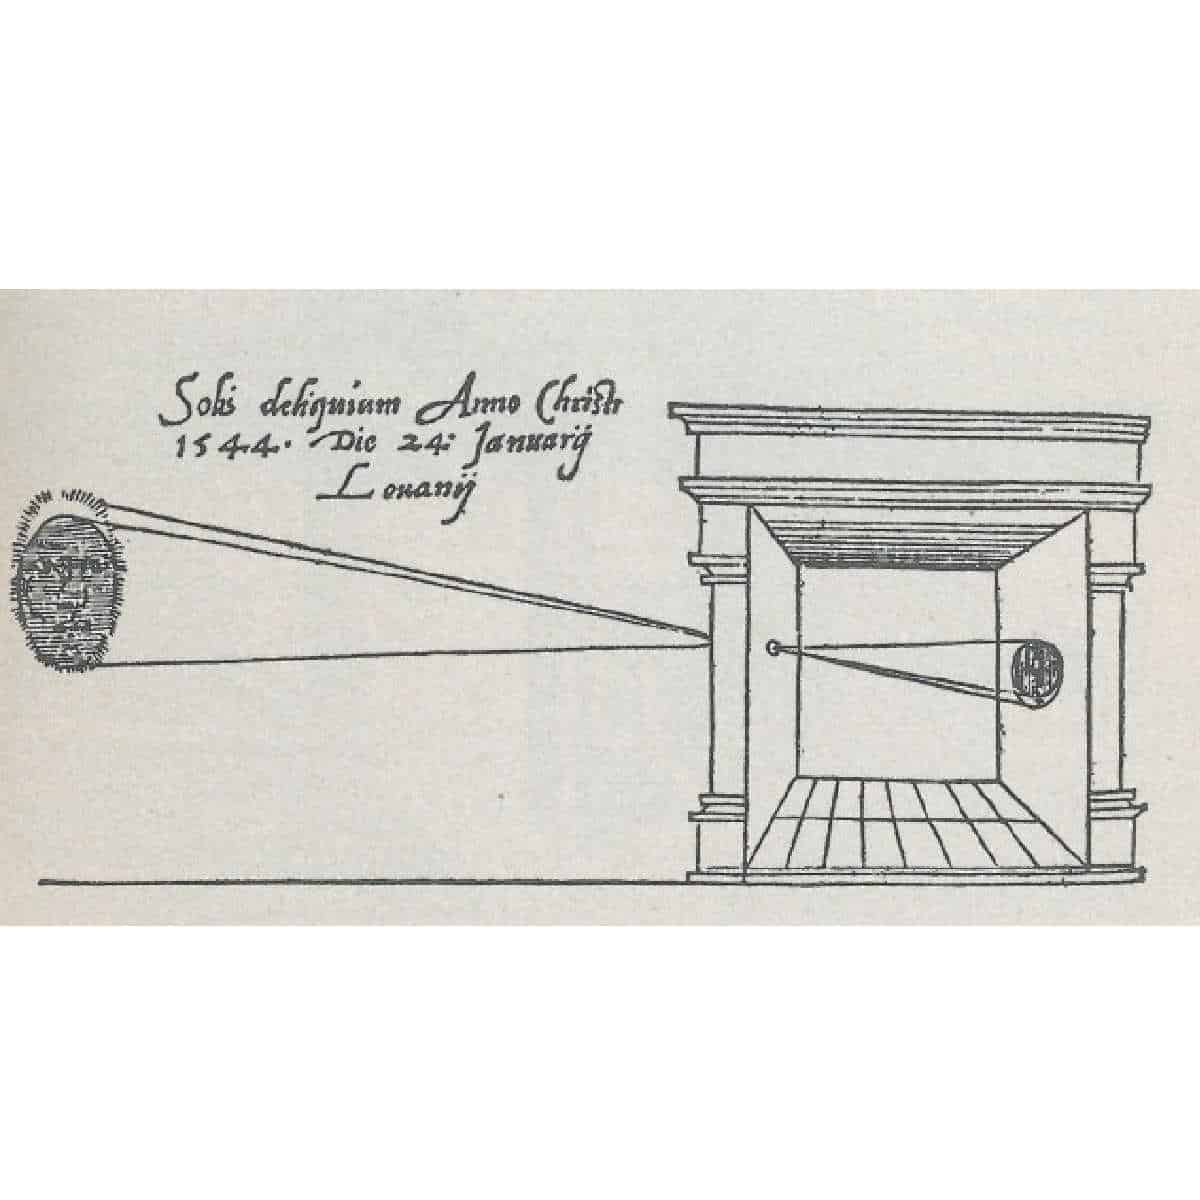
The old masters, such as Leonardo da Vinci, did not have access to modern technology to speed up the initial drawing process. They used what they had available at the time, such as the camera obscura, to get the basic shape of their subject drawn onto the canvas.
A camera obscura is a box with a small hole that allows light to go through and project an image onto the drawing surface. See the image below.
For me, well… canvas + pointy pencil + Parkinson’s is not a good mix. :). I use other methods to transfer a reference photo to a canvas.
Drawing Your Reference Photo
If your drawing skills are good, the easiest way to transfer your photo reference is to draw it onto your canvas freehand with a pencil.
This method is faster and more convenient if you paint from imagination or memory.
The downside is if you make frequent mistakes and have to erase them, you can end up with a dirty or damaged canvas.
If you use acrylic paint, use chalk or a watercolour pencil to draw your outline onto your painting surface. They can easily be removed with water.
The secret to getting an accurate drawing is to have a good reference photo and look at it frequently. Use a ruler to get a straight line and double-check proportions.
Don’t press too hard with your pencil. Light marks are easier to erase. If you erase a lot, clean your eraser frequently on a blank piece of paper or rough cloth to prevent smudges on the canvas.
A detailed drawing on your canvas isn’t necessary. You just want an idea of where to place the overall elements of your painting.
If you have an iPad, phone, or laptop, you can use it to display your reference photo while you draw and paint. You can zoom in on details or crop your photo to improve composition.
Grid Method of Transferring a Reference Photo
A second option is the grid method. I find this the most time-consuming. This method involves drawing grid lines that form equal squares on your canvas, let’s say one-inch squares, and then drawing the same one-inch squares on a copy of your reference photo.
You then draw the contents of each square in your photo onto your canvas. This method can be used to enlarge your original image to fit on large canvases.
So if you have an 8 x 10 photo and a 16 x 20 canvas, you draw 2-inch squares on your canvas.
You can also use Photoshop or any of the free photo editors, such as Gimp, to print a grid onto a copy of your photo rather than drawing the grid out yourself.
For more information on using the grid method to enlarge a reference photo that you want to transfer, see my post on Enlarging a Reference Photo.
Using Transfer Paper
My favourite way to transfer my reference photo to a canvas is using transfer paper or graphite paper.
Transfer paper is thin paper with graphite on one side. It is usually black and white (or grey), but I have recently seen it in other colours.
It is wax-free, easily erased, and can be used again and again until the graphite is used up.
There are several different types, but buying it on a roll like this one is the most economical and easy way to get your reference picture onto your canvas.
Don’t use carbon paper because it is almost impossible to erase. Make sure what you are buying says “transfer paper” on the package.
To use transfer paper, you should have a copy of your reference photo. You can print one off or use tracing paper to trace a copy.
If you don’t have tracing paper, you can use thin parchment paper or other thin paper and a light box to trace images.
If you have a larger computer screen, you can use it to trace your photo onto paper. Just hold the paper up to your computer screen or tape it on. The computer screen acts like a lightbox so you can see your image underneath and trace over the lines. This works best in a dark room.
Place your reference photo on your canvas and slip your transfer paper under it. Make sure the graphite side is down on your canvas or drawing paper. Secure with painter’s tape.
Using a stylus or ballpoint pen, trace over the main lines of your photo. The transfer paper will transfer your lines onto your canvas.
I have a short YouTube video showing how to use the transfer and tracing paper. Click the picture below to go to YouTube.

Charcoal, Chalk, Graphite Pencil
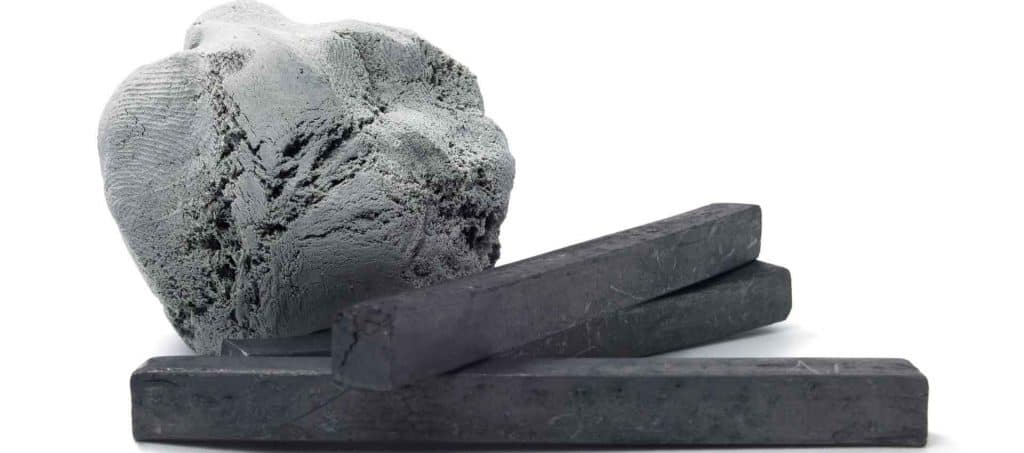
Another transfer method is to rub the back of your photo with willow charcoal, chalk, or a graphite pencil. Lay the photo on your canvas and trace the lines you want to transfer. The lines will be transferred to your canvas as you trace over them.
I find this method a little messy, but it is quick and works when you don’t have any transfer paper. A light mist of spray fixative will keep the lines in place.
Using a Projector to Transfer Your Photo

If you want to go high-tech, you can use a projector to project your photo onto your canvas. They are a little pricey, and sometimes it’s hard to find one that suits your needs, but they work well, especially for a large piece.
Stand-alone projectors are available that you can use with your reference photo. Art projectors work best and give you a clearer image from which to trace.
Some projectors connect to your computer and can project your image directly onto a surface from your desktop. These are really helpful if you are doing a large piece or a wall mural.
A Few Last Tips
- When painting with light colours, it may be a good idea to blot the drawn-on lines with a kneaded eraser to lighten them somewhat. You can also erase lines that you don’t think you will need.
- If you are using oil paint, it’s a good idea to spray any graphite lines with a fixative to prevent bleed-through.
- You don’t need to cover your entire canvas with a drawing. Being an artist means you have the creative freedom to paint whatever you want and not necessarily stick to what’s in the reference photograph. Try drawing or tracing the focal point, then add whatever you want as you go.
I hope these tips help you quickly transfer your image to your canvas. 😊
If you have any other ideas about transferring reference photos to a surface, please share them in the comments below.
You can also check out my new Facebook group for some more tips. Trembeling Art Creative Corner

If you want total accuracy and extreme detail, you can take a digital image (the higher resolution the better) of your reference to a professional xerographic office center and have the image transferred to a high quality framed canvas. FedEx Office is excellent in our area. Your masterful artistic contribution is in colorizing and/or modifying the original image to your aesthetic. The xerography method is not the cheapest, but it is a sure way to guarantee total accuracy. Even the old masters used the camera obscura or pinhole camera, so very few artists can claim to be purists.
Purists are OK. Sketchers are OK. Projectors are OK. Tracing papers are OK. Xerography is way OK. Life is short. Get on with the fun part.
I love this!
Thank you ! I’m a new artist😝 @ age 62 (retired nurse) I’m trying to learn something everyday, the one thing I have learned today with your post and excellent info. Is that it’s ok to trace and that purist are ok but so are projectors, tracing paper etc.
Blessings Nancy Nurse,
Florida.
Good advice, Michael. I once took a few lessons from an artist who goes to a professional copier as you describe with her smaller paintings and has them enlarged for large scale commissions. She says this method saves her lots of time. You’re right, time equals money for many of us and for the rest of us, time is still precious.
Hi Marilyn,
thank you very much for your helpful hints. Recently I heard another idea to transfer a photo or picture to a canvas. Just put the photo on the backside of the canvas and fix it with a tesafilm or tesaband or something alike. Take a lamp or strong light and let the photo shine througt the canvas. I had good results with that.
Best wishes Werner
How to copy a picture from mobile phone
3.Simply turn the flash light on on your phone and 4. place your phone in front of the image that has been traced onto a clear freezer bag. 1. I cut the front out of a box the size of the freezer bag. 2.Tape it to the opening that has been cut out. You will need to maneuver the light somewhat depending on the size you want to draw on your canvas. Works like a charm. I use this method all the time. Hope this helps.
Great tip!!
If you find use of photos somehow cheating, read David Hockney’s wonderful Secret Knowledge where he demonstrates the use of projected images since the very earliest European painting, using convex mirror as a lense, hence the photographic appearance of European art
Placing books under stretch canvases prevents dents from pushing too hard when tracing on canvas.
Also using a colored pencil over tracing helps to see if you have forgotten any area if your drawing.
I also recommend after drawing is tracing is done to use a fine point Sharpie to go over canvas drawing. Then I use an eraser to remove the graphite lines since they can smear. Since I use acrylics the paint covers the ink. All if this is done with a book or books under a stretch canvas. Helps my students to avoid damaging the canvas.
Hi Sandy; Thank you for the awesome tips! I never thought to use a permanent marker. I would be more inclined to use a Sakura Micron pigment pen since it is pigment based and not as likely to damage the surface over time. Really good ideas. Thank you. 🙂
I use half inch foam core. You can cut it to size it is firm and light weight and will stay put till you want it to come out.
Thanks so much! No more guilty feelings for me because I use some of the tools you mentioned. Also thanks to the other artists for their input. I will be looking for a prospek.
I have a Voilamart that has worked well for me in transferring photo’s onto Watercolor paper. I am now in the process of moving on to Acrylic painting but have been at a loss as how to transfer the photo onto canvas by doing so with the Voilamart. The problem seems to become more difficult if I cover the canvas with Gesso. Any Idea ? Thanks for the help.
Great information. Thanks. I trace my image onto tracing paper, outline with black marker pen then pop it under my canvas and trace on with a pencil. A desk lamp is helpful.
Great idea! Worked well for me, thanks a bunch
Thanks for the transfer and grid tip 👍. Hopefully the scale of my objects will be better. 🙂
If you like the grid method, you can download an app for cross stitching. The cross stitching software will print the image on the grid just by uploading it. It also gives you the DMC color that you can use as a color reference. There are many free cross stitch applications out there that are free. The Play Store has several if you like using your phone over a computer/tablet. If you have a wireless printer you can print using your phone. I hope this helps someone. Happy painting!
Hi Marylin
Thank you for sharing you valuable idea I want to try painting but I cannot draw. I will try to take your method on board and I am ordering a projector from AliExpress very cheap on this site. I would love to know what sort of fixative spray do you use please.
Thanking you very much
Lilette
Hi Lilette; I use Krylon Workable Fixatif available on Amazon. I find it works well for me. There are many more available on the market. It is a good idea to test them on a scrap piece of paper to make sure they don’t leave an oily film or stain. Hope this helps. 🙂
Thank you for sharing. I love painting but cannot draw so I have used all three methods i.e. projector, grids and transfer paper. I always feel as tho I am not an artst because I do this, but reading your site, I feel a lot better.
Thank you for this information. I can draw but sometimes The picture isn’t right so I resort to graphite paper. I just started oil painting at 70 so I have had to learn color theory and technique but it is coming along. I do not think the teacher would appreciate me telling her that I had to use tracing and graphite paper for my landscape project. Thank you for this information. Doreen
What are the names of the projectors that we can use?
I have an Espon and recently bought Walmart’s Ommi, Espon is older but much better.
Thank you for sharing such valuable information
For faces I use a plain paper printout image from my computer. On the reverse side of the printout I fill in the transfer areas with a soft lead pencil. When the image is positioned on the canvas I then go round the outline of the image with a good sharp pointed pencil which will trace the image to the canvas.
That’s a great technique and a time saver. Thanks for sharing. 🙂
Awesome,thanks for this valuable information
Thank you. 🙂
Thank you for sharing such valueable information
Thank you. 🙂
If you haven’t used a proportional divider (also called a prospek), you should check it out. You can enlarge or reduce an image as well as one-to-one transfer. It as an incredible aid to getting proportions correct.
Thank you for the tip. I will definitely be trying this out. 🙂
Where did you find this tool?
Would you get this at an office supply store
thanks for the info! I was wondering which projectors you like that can be connected directly from a laptop? I have a old school ancient projector that requires a photo to be used and alot of moving it around in the dark to get the image onto the canvas or paper, and I know there is some much easier way out there! on a side note, I think it is great to draw out your image/composition free hand if you want and I can, but I really prefer to get into the paint and cut my set up time down to a minimum, especially if I intend to sell or market the piece…. and I don’t think its ‘wrong’ or cheating to do that, and its good to keep practicing your drawing skills all the time, as well!
Enjoyed all the tips and information. I also wondered what type or brand of projector are used? I saw this question asked a couple of times but didn’t see an answer???
Hi Diana: I use an Artograph projector that I got at a second hand store a few years ago. I did a quick check and a similar one is available at Jerry’s Artarama https://www.jerrysartarama.com/furniture/projectors-and-lightboxes/artograph-projectors-and-lightboxes/artograph-tracer-projector. You can also check on Amazon for an artists projector/tracer.
Hope this helps. 🙂
I think you are wonderful, painting with Parkinson’s. It does not matter how you get your under picture on the canvas. Who is going if you don’t tell them! Best wishes
My husband just got me a
projector to start using. I’m a little shacky and it’s hard to draw. Plus I’m not that great at it anyway. So I’m ready to use it, but I think people will
say that it’s cheating and real art. I would still have to paint it. What you say to someone that might say it’s cheating?
Darlene, I don’t think you have to justify anything to anybody, but to make things easier: I would tell them that you do not like drawing at all, not even sketching, but you love painting, so that is just to keep the whole process enjoyable and not waste your time on the drawing part, while you can’t await to start painting.
Robert here. Cheating using an artograph ? No , it is a wonderful tool and in a short time you are ready to paint. Am mainly now in Watercolor and my artograph is very flexible to use in composing your subject , you can move items around, delete , change subject for a better composition, on and on. There will always be something that needs changing as you create your masterpiece. Cheers
Hi Darlene. Who is going to know if you don’t tell them? And it’s not being deceitful to have a little help when you need it. The painting that you do on that canvas is the final product anyway.
That’s good to know that you could use a projector to draw the picture. I would think that would be about the extent of my skills though. I’ll have to consider getting someone to paint in the picture that drawing so that I could still have something nice looking if I decide to have a portrait of my dog.