
So, you’ve found the perfect reference photo and can’t wait to start your painting. But what is the best way to transfer a reference photo to a canvas so you can paint your masterpiece?
There are several methods to do this, depending on what you have available and how much time you have. Here are a few that I have used.
You will first need a reference photo, perhaps your favourite photo of your pet or a photo from vacation. If you haven’t found your perfect reference photo yet, check out my post on where to find free reference photos.
This post may contain affiliate links. If you click a link and buy, I may receive a small commission. Please see my full privacy policy for details.
The Debate Over Transferring a Reference Photo to a Canvas
There is some debate among artists about the best methods for transferring your reference photo.
Some say a true artist shouldn’t use any method other than drawing. Some even frown on the use of reference photos.
I believe there is much more to painting than just drawing your reference, so it really doesn’t matter.
Modern equipment and techniques have made it much faster to get your idea on canvas, but a good painting also involves understanding colors, tones, shadows, and highlights, as well as a whole host of other things.
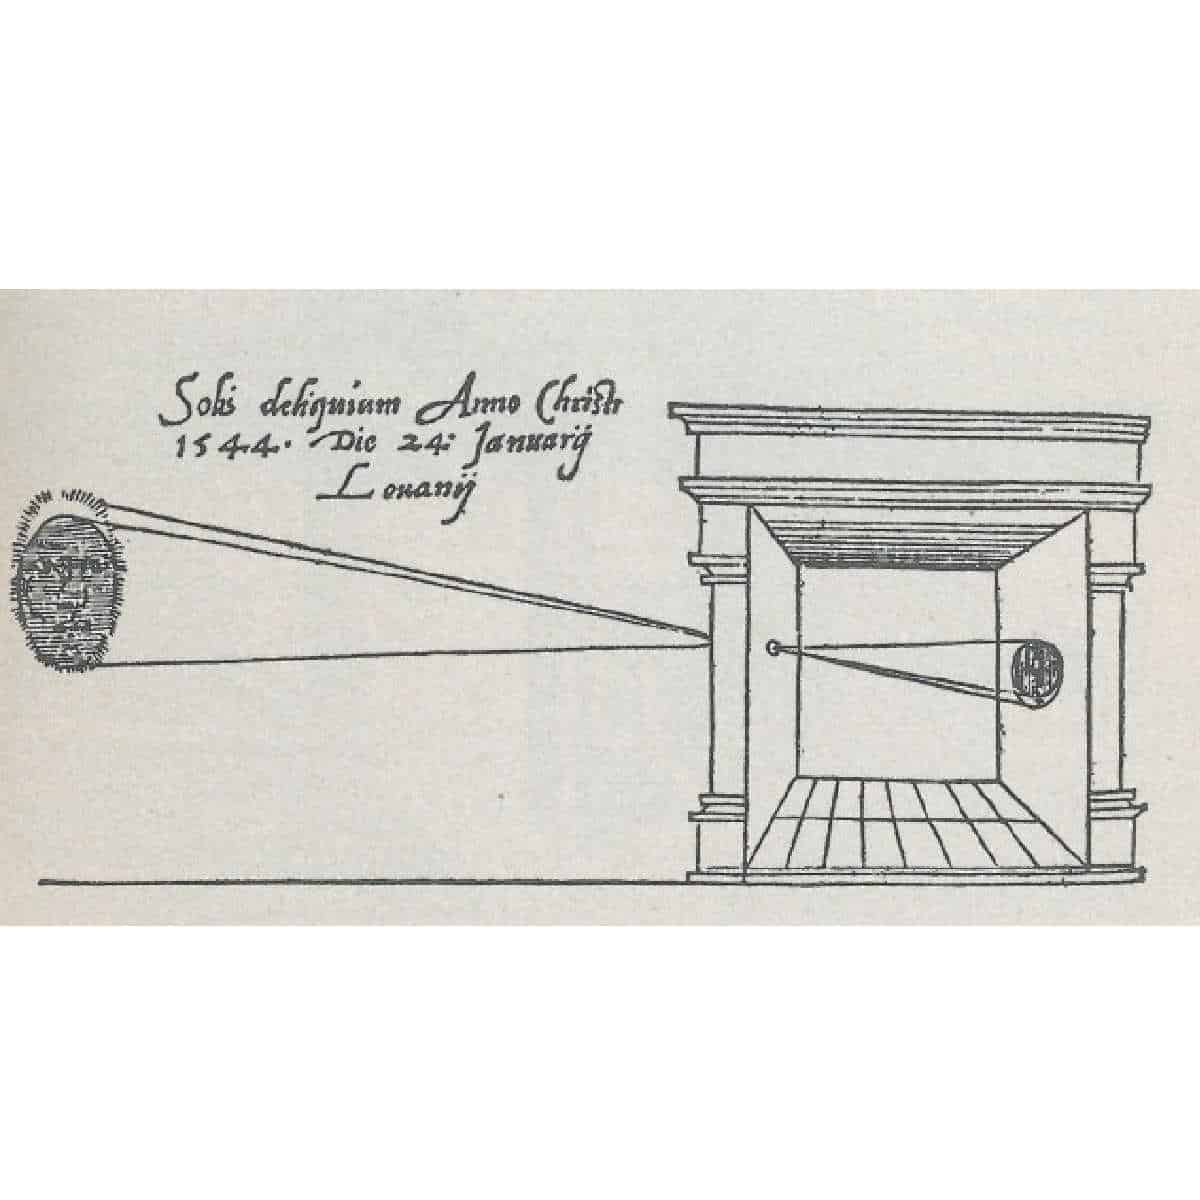
The old masters, such as Leonardo da Vinci, did not have access to modern technology to speed up the initial drawing process. They used what they had available at the time, such as the camera obscura, to get the basic shape of their subject drawn onto the canvas.
A camera obscura is a box with a small hole that allows light to go through and project an image onto the drawing surface. See the image below.
For me, well… canvas + pointy pencil + Parkinson’s is not a good mix. :). I use other methods to transfer a reference photo to a canvas.
Drawing Your Reference Photo
If your drawing skills are good, the easiest way to transfer your photo reference is to draw it onto your canvas freehand with a pencil.
This method is faster and more convenient if you paint from imagination or memory.
The downside is if you make frequent mistakes and have to erase them, you can end up with a dirty or damaged canvas.
If you use acrylic paint, use chalk or a watercolour pencil to draw your outline onto your painting surface. They can easily be removed with water.
The secret to getting an accurate drawing is to have a good reference photo and look at it frequently. Use a ruler to get a straight line and double-check proportions.
Don’t press too hard with your pencil. Light marks are easier to erase. If you erase a lot, clean your eraser frequently on a blank piece of paper or rough cloth to prevent smudges on the canvas.
A detailed drawing on your canvas isn’t necessary. You just want an idea of where to place the overall elements of your painting.
If you have an iPad, phone, or laptop, you can use it to display your reference photo while you draw and paint. You can zoom in on details or crop your photo to improve composition.
Grid Method of Transferring a Reference Photo
A second option is the grid method. I find this the most time-consuming. This method involves drawing grid lines that form equal squares on your canvas, let’s say one-inch squares, and then drawing the same one-inch squares on a copy of your reference photo.
You then draw the contents of each square in your photo onto your canvas. This method can be used to enlarge your original image to fit on large canvases.
So if you have an 8 x 10 photo and a 16 x 20 canvas, you draw 2-inch squares on your canvas.
You can also use Photoshop or any of the free photo editors, such as Gimp, to print a grid onto a copy of your photo rather than drawing the grid out yourself.
For more information on using the grid method to enlarge a reference photo that you want to transfer, see my post on Enlarging a Reference Photo.
Using Transfer Paper
My favourite way to transfer my reference photo to a canvas is using transfer paper or graphite paper.
Transfer paper is thin paper with graphite on one side. It is usually black and white (or grey), but I have recently seen it in other colours.
It is wax-free, easily erased, and can be used again and again until the graphite is used up.
There are several different types, but buying it on a roll like this one is the most economical and easy way to get your reference picture onto your canvas.
Don’t use carbon paper because it is almost impossible to erase. Make sure what you are buying says “transfer paper” on the package.
To use transfer paper, you should have a copy of your reference photo. You can print one off or use tracing paper to trace a copy.
If you don’t have tracing paper, you can use thin parchment paper or other thin paper and a light box to trace images.
If you have a larger computer screen, you can use it to trace your photo onto paper. Just hold the paper up to your computer screen or tape it on. The computer screen acts like a lightbox so you can see your image underneath and trace over the lines. This works best in a dark room.
Place your reference photo on your canvas and slip your transfer paper under it. Make sure the graphite side is down on your canvas or drawing paper. Secure with painter’s tape.
Using a stylus or ballpoint pen, trace over the main lines of your photo. The transfer paper will transfer your lines onto your canvas.
I have a short YouTube video showing how to use the transfer and tracing paper. Click the picture below to go to YouTube.

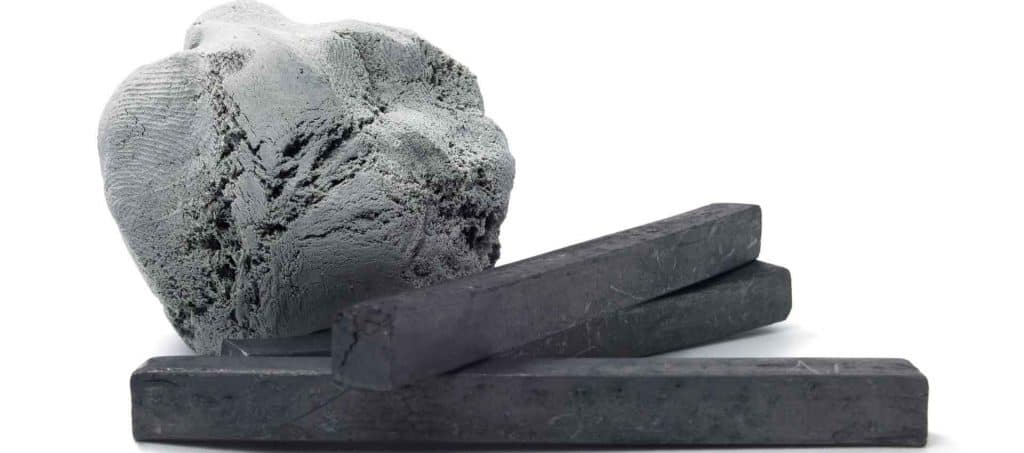
Charcoal, Chalk, Graphite Pencil
Another transfer method is to rub the back of your photo with willow charcoal, chalk, or a graphite pencil. Lay the photo on your canvas and trace the lines you want to transfer. The lines will be transferred to your canvas as you trace over them.
I find this method a little messy, but it is quick and works when you don’t have any transfer paper. A light mist of spray fixative will keep the lines in place.
Using a Projector to Transfer Your Photo

If you want to go high-tech, you can use a projector to project your photo onto your canvas. They are a little pricey, and sometimes it’s hard to find one that suits your needs, but they work well, especially for a large piece.
Stand-alone projectors are available that you can use with your reference photo. Art projectors work best and give you a clearer image from which to trace.
Some projectors connect to your computer and can project your image directly onto a surface from your desktop. These are really helpful if you are doing a large piece or a wall mural.
A Few Last Tips
- When painting with light colours, it may be a good idea to blot the drawn-on lines with a kneaded eraser to lighten them somewhat. You can also erase lines that you don’t think you will need.
- If you are using oil paint, it’s a good idea to spray any graphite lines with a fixative to prevent bleed-through.
- You don’t need to cover your entire canvas with a drawing. Being an artist means you have the creative freedom to paint whatever you want and not necessarily stick to what’s in the reference photograph. Try drawing or tracing the focal point, then add whatever you want as you go.
I hope these tips help you quickly transfer your image to your canvas. 😊
If you have any other ideas about transferring reference photos to a surface, please share them in the comments below.
You can also check out my new Facebook group for some more tips. Trembeling Art Creative Corner

Thank you for sharing your expertise and some personal history. I appreciated that very much. Mine was a brain injury. Art is one of the things that ‘repairs’ some of that damage.
I learned something today that I didn’t know. It may help me out of the computer(s) and onto the canvas. ✌️
Jimy
What is best, inexpensive projector for photos from phone? Advice would greatly be appreciated.
I have a canvas 36″ x 48″ ‘ large. ‘ And the subject will be two people embraced. I need accuracy of photo and have only a cell phone and then ability to transfer to the large canvas.
Hi Sandra, Did you know you can transfer photos from your phone to a thumb drive then have them printed. I just found this out and wanted to share with you. I hope you found a way to transfer the image onto your canvas.
Using a data projector is the hands down winner in terms of time. Using oils or acrylics, in no time you have painted over the lines, so your real painting skills are tested then. Ideally photos should only be used as a reference as good composition often requires leaving some items out or moving others around. Preferably use photos you have taken yourself together with a quick sketch in the field with colour notes. Cameras, particularly using telephoto lenses can distort an image and they often do not adequately record details within shadow areas.
Can anyone tell me the best one to transfer an image onto a mushroom conk. I am an absolute beginner. I have been told to use pencil rub but not too sure how to do it. Any advice would be appreciated.
Hello Marilyn
I have been trying to get white graphite paper to trace onto a black canvas but here in South Africa
I have had no such luck, and reading through these comments the word Sally comes up. Will Amazon which delivers to SA, sell these these transfer papers or is there any other reliable company that will deliver. I am looking for the most reasonable cost due to our exchange rate being 17 Rand to the Dollar.
Thank you
Use white chalk on the back of picture to be transferred, using a pencil go over the lines. There you made you own white transfer paper. Good Luck!
Deidre
Thank u what a gud idea I wil definitely do this nextime
My husband made me a simple light box..bright fluoro light under clear Perspex or glass placed in a simple box..place good art paper over photo and this way you only draw image once. It shows through light very well…bit like putting image up to a window on a bright sunny day.. both ways work well.
Whatever my reference photo is I bring it up on my computer screen, edit, crop etc. Then I tape tracing paper to computer screen and draw reference lines. I remove tracing paper and transfer reference lines to my paper or canvas using graphite paper.
I think I have used all of the methods described, but here is the one I use now.
I place something behind the canvas for support.
I place a sheet of Sally on the canvas and tape it on the edges.
I print a copy of the image, printed to desired scale, on my inkjet, on the Sally
and tape the edges.
I then trace the desired parts of the image with a ball point stiles.
Note: Sally is a “carbon ” type paper that leaves lines that are safe to paint over.
It comes in white, gray and light blue.
Where can you order this Sally paper?
Hi Eva; You can get Saral paper at Amazon. The roll is kind of pricey but you can also buy smaller packages. Anything labeled graphite transfer paper will work fine. You can also buy packages or sheets of graphite transfer paper at Michaels, Walmart or most art supply stores. Hope this helps. 🙂
Frank,
I am a late bloomer, but, a great descendant of my mother’s exquisite talent LOL !!!!!! My mother being the 40 year art teacher and a brilliant artist has always tried to give me simple ways to conduct my artwork since she is so proud at 40 I have finally decided to become what she is but I wanna let you know that your way of transferring is the easiest way they’re all great ways but your way has made it so simple because I have course chose the wall paintings in artistry and pencil on canvas that are murals so mine are in grand scale and to transfer a small photo of any type onto something so large is crazy and your way has given the simplest way to do that so thank you very much for your input and I appreciate it and I hope other people try your way